
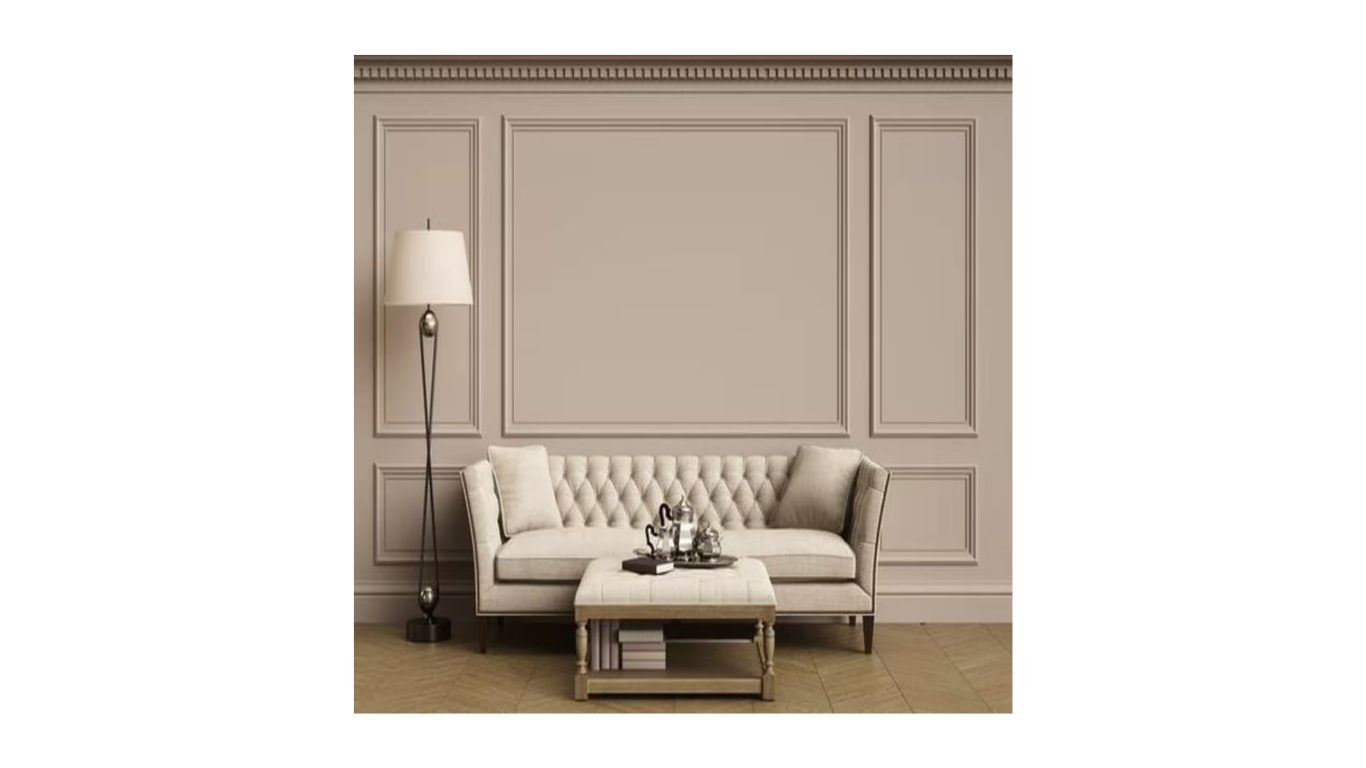
How I Built this Accent Wall (No Power Tools Required)
If you’ve ever wanted to add an accent wall to your home but felt intimidated by power tools, complicated cuts, or DIY overwhelm, this one’s for you! This accent wall in my guest bedroom was created using a pre‑cut trim kit I purchased from Etsy, and the entire process was way less intimidating than I expected. No miter saw. No complicated math. And no professional experience required.
If I can do this, you absolutely can too!

Why I Chose a Pre‑Cut Trim Kit
I found this pre‑cut trim kit on Etsy, and it completely simplified the process! Everything arrives already measured and cut for your wall size, which removed the hardest and most intimidating part of creating a trim accent wall for me.
No cutting trim yourself
No special tools required
Cleaner, more precise layout
Much less room for error
This is a great option if you want a high‑end, custom look without a full DIY learning curve.
Step‑by‑Step: How I Built The Accent Wall
Step 1: Tape Out the Measurements First
Before anything else, I drew everything out on piece of paper to get the correct spacing and then I taped out the full design on the wall using painter’s tape. This step is crucial for me as it allows you to visually confirm spacing, proportions, and overall layout before committing and putting nail holes in your wall!
Step 2: Paint the Wall First
Once the layout looked right and I had all the correct spacing measurements, I removed the tape and painted the wall in Sherwin‑Williams Urbane Bronze.
Painting the wall before installing the trim saves time later and helps you get clean edges once everything is installed.
Step 3: Prime and Paint the Trim (Before Installing)
Before attaching anything to the wall, I primed and painted all of the trim pieces the same color as the wall.
This makes the finished wall look seamless and also makes touch‑ups much easier after installation.
Step 4: Install the Trim (No Power Tools Required)
I installed the trim one piece at a time using a level, painter’s tape (to temporarily hold pieces in place), and finish nails. I used painter’s tape to hold each piece exactly where I wanted it, checked that it was level, and then nailed it into the wall. Some others have suggested to use glue as well to get a really good hold to the wall, but I found it wasn’t absolutely necessary for this room. In a kid’s room or high traffic area, you may want to consider.
You could use a brad-nailer and a second person to speed things up, but I did not and it’s absolutely not required.
Step 5: Final Touch‑Ups
After all the trim was installed, I went back over everything with one final coat of paint. This step hides nail holes and creates that clean, finished look.

This accent wall completely transformed my guest bedroom and it didn’t require power tools, complicated cuts, or professional experience! If you’ve been waiting for a sign to try a DIY project like this, this is it. Start simple, take it step by step, and trust the process. If I can do this, so 👏🏻 can 👏🏻 you 👏🏻
Tools & Materials Used
Paint + primer (make sure the primer is either water or oil based on the wall paint you are using)
Paint pad for painting the wall and paint brushes for the trim
Want to see these steps in action? You can watch the full Reel I created to show you the steps!
And, if you’re looking for all the links, SHOP my entire guest bedroom here!